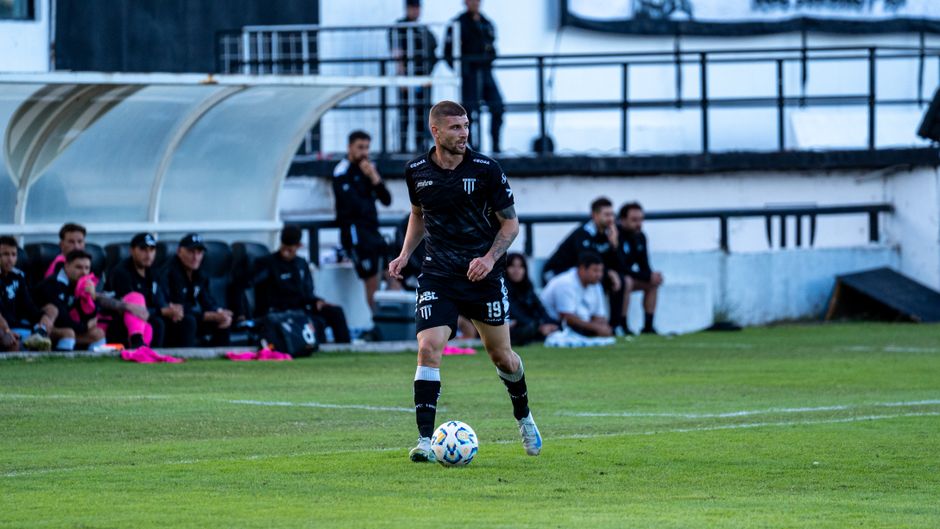
A college soccer recruiting video should be 3-5 minutes long, lead with your strongest clips, clearly identify you before each play, and show game footage — not training. Coaches receive hundreds of recruiting emails. Your video needs to show them what you can do, fast.
The recruiting video is one of the most important tools in a college-bound soccer player's toolkit. It's often the first impression a coach gets of you, sometimes even before they see you play in person. A well-made recruiting reel can open doors to schools you never thought possible. A poorly made one can close them before you even get a response.
This guide covers everything you need to know — from how long your video should be, to what coaches at different positions are looking for, to the most common mistakes that send your email straight to the archive folder. Whether you're a sophomore just getting started or a senior making a final push, this is your complete playbook for building a recruiting video that gets watched.
How Long Should Your Recruiting Video Be
The sweet spot for a college soccer recruiting video is 3 to 5 minutes. That's it. Coaches are busy — many are reviewing dozens of recruiting emails per day during peak windows — and they need to evaluate you quickly. A video that respects their time is more likely to be watched all the way through.
Here's the critical insight: front-load your best clips in the first 30 to 60 seconds. Many coaches will make an initial judgment within the first minute. If the first few clips don't catch their attention, they may move on to the next email. Lead with your most impressive moments — a perfectly weighted through ball, a commanding save, a composed finish under pressure. Put your best foot forward, literally.
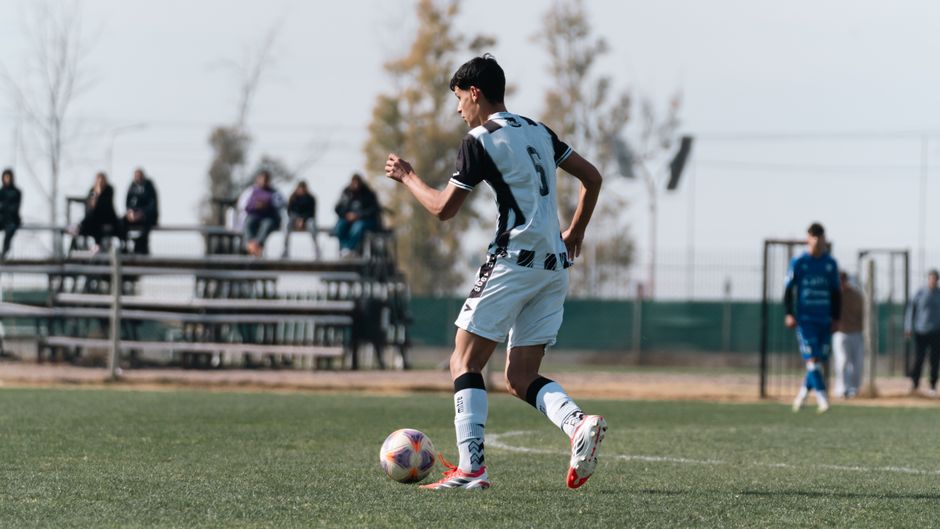
If you have an extraordinary volume of quality clips, you can stretch to 5 minutes, but that should be the absolute maximum. Going over 5 minutes signals that you either couldn't curate your best moments or don't understand what coaches are looking for — neither is a good impression.
For initial outreach emails, consider also creating a 60 to 90 second "teaser" version. This shorter cut is perfect for a first contact email where you want to grab a coach's attention without asking for a big time commitment. Include a link to your full-length reel in the same email so they can watch more if they're interested. Think of the teaser as a movie trailer — it should leave them wanting to see the full film.
One more timing tip: don't pad your video with slow-motion replays of every clip. One or two slow-motion replays of truly exceptional moments is fine, but overusing slow-mo eats into your runtime and can make coaches feel like you're stretching thin content.
What Coaches Want to See by Position
Different positions demand different qualities, and coaches know exactly what they're looking for. Your video should showcase the specific skills that matter for your position. A midfielder's reel should look fundamentally different from a goalkeeper's. Here's what coaches want to see, broken down by position.
Goalkeeper
Goalkeeper recruiting videos are unique because the position is so specialized. Coaches are evaluating a very specific skill set:
- Distribution — Goal kicks, throws, and playing out of the back. Modern goalkeepers need to be comfortable with the ball at their feet. Show clips of accurate goal kicks, quick distribution to start counterattacks, and composure when receiving back passes under pressure.
- Shot-stopping — Reflex saves, 1v1 situations, and dealing with shots from distance. Include a variety of save types, not just the spectacular diving saves. Coaches want to see proper technique and positioning as much as highlight-reel stops.
- Communication and organization — Commanding the box on corners and crosses, directing the defensive wall on free kicks, and organizing the back line. This is harder to capture on video, but clips that show you actively directing teammates are valuable.
- Positioning — Cutting down angles, reading the play to come off your line at the right time, and being in the correct position before the shot is taken. Good positioning often means the save looks easy — that's a good thing.

Defender
Defenders are often underrepresented in highlight videos because their best work doesn't always look flashy. But coaches know what to look for:
- 1v1 defending — Containment, jockeying, and winning the ball cleanly. Show clips where you close down an attacker, stay on your feet, and win possession without fouling. Clean tackles are far more impressive to coaches than last-ditch slide tackles, which often suggest you were out of position.
- Heading and aerial duels — Winning headers from goal kicks, corners, and long balls. Coaches want to see that you can compete aerially and clear the ball effectively or redirect it to a teammate.
- Composure on the ball — Playing out of pressure, progressive passing into midfield, and switching the point of attack. The modern game demands defenders who can build from the back. Show clips of you receiving the ball under pressure and making good decisions.
- Recovery runs — Sprinting back to cover, tracking runners, and making recovery tackles. These clips show work rate, speed, and defensive awareness — all things coaches value highly.
Midfielder
Midfielders are the engine of a team, and coaches want to see that engine running at full capacity:
- Passing range — Both short combination play (quick one-twos, playing through tight spaces) AND long switches of play (diagonal balls to change the point of attack, long balls over the top). Showing both dimensions proves you can dictate the tempo and connect all areas of the pitch.
- Field vision — Finding runners with through balls, breaking defensive lines with passes, and seeing opportunities before they fully develop. Clips where you play a pass that most players wouldn't see are incredibly compelling to coaches.
- Work rate — Box-to-box coverage, pressing high, tracking back to defend, and contributing in both halves. Modern midfielders need to cover ground. Include clips that show you winning the ball back in your own half and then appearing in the attacking third minutes later.

Forward
Forwards get the most exciting highlight reels, but coaches are looking beyond just goals:
- Finishing — Show a variety of finishes: volleys, headers, 1v1s with the keeper, placed shots from distance, tap-ins showing anticipation. Coaches want to see that you can score in different ways, not just from one type of chance. A forward who can only score from 6 yards out is limited; one who can finish from anywhere is valuable.
- Movement off the ball — Runs behind the defensive line to get in behind, checking to feet to link up play, creating separation from markers, and making decoy runs that create space for teammates. This is what separates good forwards from great ones, and coaches know it.
- Pressing from the front — Winning the ball high up the pitch, forcing turnovers from defenders and goalkeepers, and setting the tone for team pressing. Include clips of you winning the ball back in the attacking third and creating chances from turnovers.
Regardless of position, if you can show clips from well-constructed highlight reels that demonstrate tactical awareness — being in the right place at the right time, making smart decisions — coaches will notice.
How to Structure the Video
A well-structured recruiting video makes the coach's job easier. Here's the format that works best:
Intro Card (5-10 seconds) — Start with a clean title card that includes:
- Your full name
- Jersey number
- Position
- Graduation year
- Club and/or high school team name
- Your email address or phone number
- Height and weight (optional, but helpful for coaches evaluating physical profile)
This card should be simple and readable. Don't over-design it — white text on a dark background works perfectly. The coach needs to absorb this information in a few seconds.
Clips — After the intro card, go straight into your footage. You can organize clips in one of two ways:
- Grouped by skill type — All your passing clips together, then finishing, then defending. This makes it easy for coaches to evaluate specific aspects of your game.
- Chronological within games — Showing sequences of play from individual games. This gives coaches a sense of how you perform over the course of a match.
Either approach works. The key is that each clip should be preceded by a brief title card or visual indicator — an arrow, circle, or spotlight — that identifies which player you are. More on this in the next section.
End Card (5-10 seconds) — Close with your contact information repeated. Include the same details from your intro card. Coaches may skip to the end of a video, and you want your info there waiting for them.
Music — Including background music is fine, but keep the volume low. Many coaches watch recruiting videos on mute, especially if they're reviewing several back-to-back. If you do add music, choose something upbeat but not distracting. Avoid anything with explicit lyrics. The gameplay sounds — the thud of the ball, the communication on the field — are actually useful for coaches, so don't drown them out completely.
How to Identify Yourself in the Footage
This might be the single most important technical aspect of your recruiting video, and it's the one most families get wrong. Coaches need to know which player is you — immediately, in every single clip.
Here's what works:
- Arrow or circle overlay — Place a visual indicator pointing to you before each clip starts (or in the first 1-2 seconds of the clip). This is the most common and effective approach. A bright-colored arrow or circle that briefly highlights your position on the field, then fades away as the play develops.
- Jersey number in the intro card — Always mention your number so coaches can look for it, but don't rely on this alone. On a crowded field, jersey numbers can be hard to read.
- Text overlay — Some families add a brief text label like "Player #7 in white" at the start of each clip or section. This is a simple, effective solution that removes all ambiguity.

If you're using PlayerTrac to highlight yourself in soccer video, the AI tracks your specific player through the footage, so every clip is already focused on you. The system follows your movements throughout the game, which means the resulting clips naturally center on your actions — no manual arrow-placing required.
Without any kind of tracking or highlighting, you must make it obvious which player you are. Coaches won't guess. If they can't identify you within a few seconds, they'll move to the next email. Don't assume your jersey color or number is enough — many games involve similar-looking kits, and video quality from sideline cameras can make numbers hard to read.
A useful test: show your video to someone who has never watched you play and ask them to point out which player is you in each clip. If they struggle, add more visual indicators.
Common Mistakes That Hurt Your Recruiting Video
Coaches see the same mistakes over and over. Avoiding these will put you ahead of a significant portion of the recruiting pool:
- Too long (over 5 minutes) — Coaches stop watching. A 10-minute video doesn't show that you have twice as much talent; it shows that you couldn't make hard decisions about what to include. Edit ruthlessly. Every clip should earn its place.
- Only showing goals — If you're a forward, yes, include your goals. But coaches want to see the full range of your game. A midfielder who only shows assists is hiding something, just like a defender who only shows tackles. Show the complete picture: your decision-making, positioning, technical ability, and athleticism across different game situations.
- Poor video quality — Shaky phone footage, filming from too far away, bad lighting, or footage where you're a tiny dot on a massive field. You don't need professional videography, but the footage needs to be stable and close enough for coaches to actually see what you're doing. A phone on a tripod from the press box or elevated sideline position works well.
- No contact info — Surprisingly common. Coaches watch your reel, are interested, and then have no way to contact you directly. Always include your email and phone number on both your intro and end cards.
- Training footage only — Coaches want to see how you perform in game situations, under real pressure, against real opponents. Unopposed drills and training-ground clips don't tell them how you handle the intensity and decision-making demands of competition. Game footage should make up the overwhelming majority of your reel.
- Outdated footage — Use footage from the current season or, at most, the previous season. A clip from two years ago doesn't reflect who you are as a player today. You've changed physically and technically — your reel should reflect your current abilities.
- Music too loud over gameplay sounds — If a coach can't hear the game — the communication, the impact of the ball — because your music is blasting, that's a missed opportunity. Gameplay sounds give context. Keep music subtle or skip it entirely.
One more mistake worth mentioning: not curating your clips carefully enough. If you include a clip where you lose the ball, miss a tackle, or make a poor decision, coaches will see it. Every clip should show you in a positive light. That doesn't mean you need to be perfect in every moment — a clip where you recover from losing the ball and win it back shows character — but don't include plays where you simply look bad.
Using AI to Build Your Recruiting Reel
Building a recruiting reel used to mean hours of manual work: watching full games, timestamp-ing your touches, cutting clips, arranging them, and exporting. For families without video editing experience, it was a major barrier. AI tools are changing that significantly.

Here's how PlayerTrac works for recruiting video creation:
- Upload your game film — From any source. It doesn't matter if your team uses a Veo camera, a Trace system, a GoPro mounted behind the goal, or a parent filming from the sideline with a phone. The system accepts footage from any camera.
- Identify yourself in the footage — Point out which player you are so the AI knows who to follow.
- AI tracks your player through the game — Using AI player tracking technology, the system follows your movements throughout the entire match, isolating your touches, passes, shots, tackles, and key moments.
- Review your clips — You get a collection of clips showing your involvement in the game. Browse through them, watch each one, and decide which are your strongest moments.
- Select and arrange — Pick the clips you want in your reel and arrange them in the order you prefer — strongest first, grouped by skill type, or however you want to structure your video.
- Export the final video — Download your finished recruiting reel, ready to send to coaches.
This process saves hours compared to manual editing. Instead of scrubbing through 90 minutes of game film to find your 15-20 best moments, the AI surfaces them for you. You spend your time on the creative decisions — which clips to include, what order to put them in — rather than the tedious work of finding them.
The best part is that this works regardless of your team's setup. Whether your club has a professional camera system or your mom films from a camping chair on the sideline, you can still create a polished recruiting reel. The automatic player tracking works with the footage you have, not the footage you wish you had.
For more on how this technology works, see our guides on AI player tracking in soccer and how to highlight a specific player in soccer video.
When to Start Sending Recruiting Videos
Timing matters enormously in the recruiting process. Start too late and you miss key windows. Start too early and you may not have the footage quality or maturity to make an impression. Here's a timeline that works for most players:
Sophomore Year
Sophomore year is about building your library. This is the time to start filming as many games as possible. Even if you don't send anything out yet, you're creating a bank of footage to pull from later. Set up a system — whether that's having a parent film, using a team camera, or leveraging a tool like PlayerTrac to build your highlights automatically.
During sophomore year, create a basic reel to start your recruiting profile on platforms like NCSA, SoccerWire, or your club's recruiting page. This doesn't need to be your final product — think of it as version 1.0. Begin researching programs that interest you. Look at their rosters, playing style, academic programs, and location.
One important note: NCAA rules limit when coaches can initiate contact with you, but you can reach out to them at any time. Sending an introductory email with your reel, even as a sophomore, signals initiative and genuine interest in the program.
Junior Year
Junior year is the prime recruiting window. This is when things get serious for most college-bound players. Active outreach should be a regular part of your schedule:
- Email coaches with a link to your reel, your stats, your upcoming game and tournament schedule, and your academic information (GPA, test scores, intended major).
- Update your reel every few months with new, stronger footage. Coaches want to see current form, and an updated reel shows that you're actively developing.
- Attend ID camps and showcases hosted by programs you're interested in. These are opportunities for coaches to see you play in person, but sending your reel beforehand gives them context.
- Follow up on emails. If a coach hasn't responded in 2-3 weeks, send a polite follow-up with your updated schedule or any new achievements. Persistence (not pushiness) shows genuine interest.
Many commitments happen during junior year, especially for D1 and competitive D2 programs. Don't wait until senior year if you're targeting these levels.
Senior Year
If you've committed during junior year, continue sending game film to your future coaching staff. Coaches want to see that you're continuing to develop and confirm their evaluation of you. An updated reel with your senior season highlights keeps you on their radar and demonstrates that you're still working hard.
If you're still looking for the right fit as a senior, don't panic — but do adjust your approach. Cast a wider net. D2, D3, and NAIA programs are actively recruiting seniors, and many of these schools offer excellent soccer programs with strong academics. Send updated reels with your most recent footage, emphasize your current form, and be responsive when coaches reach out.
Senior year is also a great time to attend late showcases and combines specifically designed for uncommitted seniors. Many programs fill roster spots late in the cycle and are looking for players who fit specific needs.
D1 vs D2 vs D3 vs NAIA — What Each Level Expects
Not all college soccer is created equal, and different levels have different expectations for your recruiting video. Understanding these differences helps you tailor your approach and, frankly, set realistic expectations.

Division I (D1)
D1 is the most competitive level of college soccer. Full and partial athletic scholarships are available, and the competition for roster spots is intense. D1 coaches expect polished, high-quality recruiting reels. The footage should be clear, the editing should be clean, and your best moments should be front and center. D1 programs receive the highest volume of recruiting emails, so your video needs to stand out immediately — coaches may give it less than a minute before deciding whether to keep watching.
At the D1 level, most recruited players are also being seen in person at showcases, ID camps, and club tournaments. Your video complements those live evaluations; it rarely replaces them entirely. That said, a strong video can get you invited to an ID camp or put on a coach's "watch list" for an upcoming tournament.
Division II (D2)
D2 programs offer athletic scholarships, though typically smaller amounts than D1. The quality of soccer is strong — many D2 programs would be competitive in lower-tier D1 conferences. D2 coaches may be more willing to watch a longer reel or a less polished video than their D1 counterparts, simply because they receive fewer submissions and are often building relationships with recruits more personally.
D2 is an excellent fit for strong players who want competitive soccer with more academic balance. The time commitment, while still significant, is generally more manageable than at the D1 level. Don't overlook these programs — the quality of coaching, facilities, and competition is often higher than people expect.
Division III (D3)
D3 programs do not offer athletic scholarships, but academic and merit-based financial aid is still available — and at many D3 schools, that aid can be substantial. D3 coaches are often more relationship-driven in their recruiting. They may value a phone call or campus visit as much as a video. That said, having a video is still essential for getting on their radar.
Video quality matters less at the D3 level than demonstrated ability. Coaches understand that not every family has access to professional videography or editing tools. What they're looking for is evidence that you can play at their level. Walk-on paths are also more common and more viable at D3 programs — many successful D3 players were not heavily recruited but earned their spot through tryouts.
NAIA
NAIA programs are often overlooked in the recruiting conversation, which is a mistake. Scholarships are available, and the amount varies significantly by school. Many NAIA programs are highly competitive and have produced professional players. The recruiting process at NAIA schools can be more flexible and personal — coaches may have more freedom in how and when they recruit, and roster sizes can be more accommodating.
NAIA is worth exploring especially if you're looking for a smaller school environment, a specific geographic region, or a program where you can contribute right away. The video expectations are similar to D2 and D3: quality matters, but coaches are more focused on your ability than your production values.
At every level, having a recruiting video is now table stakes. It's not a differentiator — it's a baseline expectation. The question isn't whether you need one, but how good yours is compared to the competition. For a step-by-step guide on creating yours, check out our complete guide to building soccer highlight reels.
The tools and techniques in this guide work regardless of what level you're targeting. Start filming early, build your library, curate your best moments, and put together a reel that shows coaches exactly who you are as a player. Your video won't get you a scholarship by itself — but without one, you're making the process significantly harder than it needs to be.