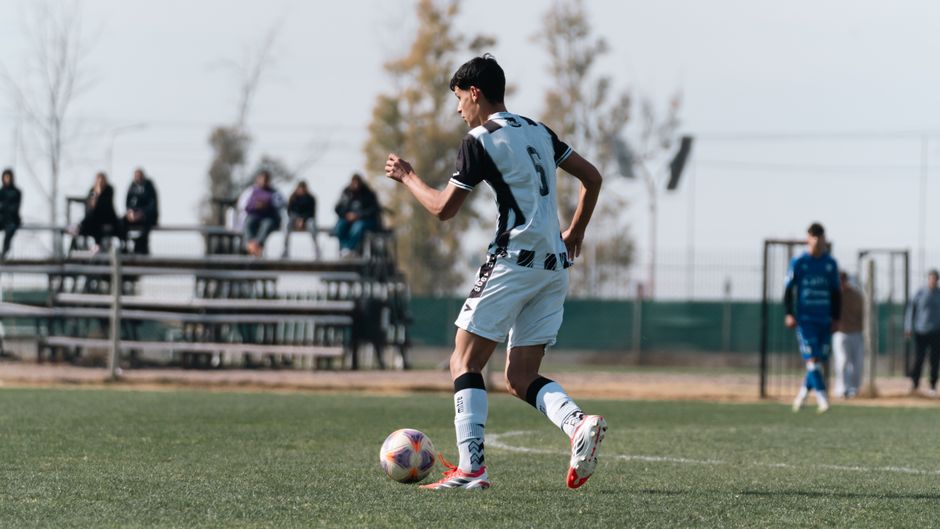
Why Soccer Video Feels Harder Than It Should
You recorded the game. You've got 90 minutes of footage sitting on your phone or laptop. Your child played well — you know they did, because you watched from the sideline. But when you sit down to find those moments in the video, everything falls apart. You're scrubbing through a tiny progress bar, squinting at a wide shot of 22 players, trying to figure out which white jersey belongs to your kid.
This is not your fault. Soccer is structurally harder to capture than almost any other youth sport. A basketball court is 94 feet long. A soccer field is 330 feet long — more than three times the size. In basketball, your child touches the ball dozens of times per quarter. In soccer, a typical youth player might touch the ball 40 to 50 times across a full 90-minute match. That means your child spends the vast majority of the game running, positioning, and making decisions that happen off the ball — and most cameras follow the ball.
Unlike baseball, where the action resets between pitches, or football, where there's a break between plays, soccer is continuous. The camera never stops, the players never stop, and there's no natural moment where the editor gets a chance to reset and refocus. If your child makes a great run but the ball goes to the other wing, the camera probably missed it entirely.
Here's the math that makes most parents give up: if your child touches the ball 45 times in 90 minutes and each touch lasts about 3 seconds, that's roughly two and a half minutes of on-ball action spread across an hour and a half of footage. Finding those moments by scrubbing manually can take two to three hours. For one game. Most parents try it once, realize how painful it is, and never do it again.
But the problem isn't that you lack video editing skills. The problem is that soccer video is a needle-in-a-haystack challenge, and nobody told you that upfront. Once you understand this, the solution becomes obvious: you need a way to skip the haystack and go straight to the needle. That's what the rest of this guide is about.
Use the Footage You Already Have
Before you spend money on a new camera or stress about your filming technique, take a breath. The footage you already have — sitting on your phone, in your Google Photos, on a shared team drive — is almost certainly good enough to work with.
Here's what counts as usable video for finding your child and building clips:
- Phone footage from the sideline — This is what most parents have, and it's completely fine. Even if you were hand-holding the phone and the video is a little shaky, it's workable. If you used a tripod, even better.
- Veo or team camera recordings — If your team or club uses a Veo, Trace, or Pixellot camera, that panoramic footage is actually ideal. It captures the full field from an elevated angle, which means your child is almost always in the frame.
- GoPro or action camera clips — Wide-angle footage from behind the goal or a corner flag works surprisingly well, especially for set pieces and goal-area action.
- Footage shared by other parents — The parent on the other side of the field might have a better angle of your child's goal. Don't overlook footage you didn't film yourself.
- Livestream recordings — Tournament or league livestreams, if you have the recording, can be a great source because they're typically shot from an elevated, stable position.
Here's the counterintuitive part: wider footage is actually better for finding your child. When you zoom in tight on the ball, your child disappears from the frame every time they're not directly involved in the play. A wide shot that captures the full field — or at least the full half — keeps your child visible even when they're making an off-ball run or holding their position.
The goal at this stage is not cinematic quality. It's not broadcast-ready footage. It's simply having a video where your child is visible for enough of the game that you can find their key moments. If you can see them in the footage, you can work with it.
Parent tip: Don't delete or ignore "bad" footage. A shaky, zoomed-out phone video might contain the goal or the tackle that makes the difference. You can always stabilize or crop later — but you can't recreate a moment you didn't record.
Identify Your Child Once
Whether you're using AI tools or going through footage manually, every workflow starts the same way: you need to clearly establish which player is yours. This sounds obvious, but it's the step that determines how easy or hard everything else will be.
If you're using an AI tracking tool like PlayerTrac, identification happens once at the beginning. You'll see a frame from the video, and you click on your child — or select them from a list of detected players. The AI locks onto their appearance: jersey color, number, body size, movement patterns. From that single identification, it follows your child through the entire match. You don't need to find them again — the system does the rest. This is the approach detailed in our guide on whether AI can track your child in a soccer game.
If you're reviewing manually, spend two minutes before you start scrubbing to establish your visual anchors:
- Jersey number and color — the most obvious identifier, but can be hard to read in wide shots.
- Unique gear — colored cleats, a headband, specific sock style, goalkeeper gloves, or a distinctive sleeve color under the jersey.
- Physical build and movement — after a few games, you'll know your child's running style from across the field. Lean into that.
- Position on the field — if your child plays left back, you can narrow your search to a specific area for most of the game.
One critical situation: when both teams wear similar jersey colors. This happens more often than it should in youth soccer. If the home team wears white and the away team wears light gray, even experienced eyes struggle. In these cases, find a moment in the footage — ideally early in the game — where your child is clearly identifiable (standing near you on the near sideline, or visible during the coin toss or team photo). Mark that timestamp. It becomes your reference point for the rest of the session.
The key insight is that you only need to do this work once per game. Whether it's a single click in an AI tool or a mental note you carry while scrubbing, establishing identity upfront saves you from second-guessing on every clip.
Review the Player, Not the Whole Game
This is where most parents lose hours. They sit down, press play, and try to watch the entire game from start to finish, pausing whenever they spot their child doing something noteworthy. It feels like the logical approach. It's also the slowest one imaginable.
Think about it: your child is actively involved in a moment worth clipping maybe 15 to 25 times in a game. That's 15 to 25 moments spread across 90 minutes. Watching the full game at normal speed to find them means sitting through 85 minutes of footage that isn't relevant to your goal. Even at 2x speed, that's still 45 minutes of watching and waiting.
The better approach is to focus on the player, not the match.
With AI player tracking, this is automatic. Tools like PlayerTrac's highlight feature process the full game and present you with a timeline of just your child's involvement. You review a curated set of moments, not the raw 90 minutes. What would have taken hours takes 15 to 20 minutes.
Without AI, you can still be smarter about it:
- Ask your child after the game. "What happened in the first half when you were on the left side?" or "What minute was that goal?" Kids remember their moments better than you'd expect. Use their recollection to jump to specific timestamps instead of scrubbing blind.
- Use the game sheet or stats. If the team keeps stats, you know roughly when goals, assists, or cards happened. Jump to those moments first.
- Scrub the progress bar visually. In a wide shot, you can often spot your child's jersey color as you drag the playback slider. It's faster than watching at 2x.
- Watch the positions, not the ball. If your child is a center back, skip to defensive sequences. If they're a striker, jump to moments when the ball is in the attacking third. You know the game — use that knowledge to skip the parts where your child isn't involved.
The mental shift is simple but powerful: you are not reviewing a soccer game. You are building a collection of one player's moments. Everything else is noise.
Save Clips With Purpose
Once you start finding your child's moments in the footage, the temptation is to save everything. Resist that urge — at least resist saving everything into one undifferentiated pile. Different clips serve different purposes, and understanding this upfront will save you significant time later when you actually need to use them.
Recruiting clips
These are the clips that show your child at their competitive best. A clean tackle in a high-pressure moment. A through ball that splits the defense. An athletic save. A composed touch under pressure. Recruiting clips should demonstrate skill, decision-making, and athleticism in game situations. They don't need to be goals — coaches often care more about positioning, first touch, and soccer IQ than they do about highlight-reel finishes.
For recruiting clips, context matters. Include 3 to 5 seconds before the key action so the coach can see the decision being made, not just the result. A good recruiting clip is typically 8 to 15 seconds long.
Development clips
These are clips you'll review with your child or share with their coach to work on improvement. A moment where your child got caught flat-footed. A pass that went behind the runner. A defensive lapse where positioning could have been better. These aren't negative — they're tools for growth.
Development clips should include enough context to understand what happened before and after the moment. A 10 to 20 second clip with the buildup, the mistake or missed opportunity, and the consequence gives the player and coach something to actually discuss. Save these even if they're not flattering — they're often more valuable than the highlight clips.
Family memories
The goal your child scored that made the whole sideline erupt. The celebration with teammates. The moment they helped an injured opponent up. The pre-game huddle. These clips aren't for coaches or scouts — they're for grandparents, family group chats, and the scrapbook you'll be glad you kept.
Family clips can be any length. They don't need perfect quality. A slightly shaky, zoomed-in phone video of your child's reaction after scoring is more meaningful to your family than a perfectly framed wide shot. Save these generously.
Social media clips
If your child (or your family) shares highlights on Instagram, TikTok, or Twitter/X, these clips have specific requirements. They should be short — 5 to 15 seconds maximum. The action should be immediately clear. Vertical or square cropping works best for mobile feeds. The viewer needs to understand what's happening within the first second.
Social clips benefit from a quick player identifier at the start — a text overlay with "No. 7" or your child's name — because the viewer has no context and won't watch long enough to figure it out themselves.
By separating your clips into these categories from the start, you avoid the common trap of having 200 unlabeled clips on your desktop and no idea which ones to use when a coach asks for film or Grandma asks for a video.
Make the Athlete Obvious
This is the step that separates useful clips from confusing ones. You've watched the footage enough to know exactly which player is your child. But the person watching your clip — a college coach, a grandparent, a friend — doesn't have that knowledge. They're going to see 22 players and wonder which one they should be watching.
For recruiting clips, this is non-negotiable. College coaches review hundreds of videos. If they can't identify your child within the first two seconds, they'll move on. A brief arrow pointing to your player at the start of the clip, a text overlay with the jersey number, or a circle or spotlight effect that follows your child for the first few seconds — any of these work. The key is that the coach never has to guess.
For development clips shared with coaches, identification still matters but can be simpler. A quick note in the email or message — "Watch No. 14 on the left side" — is usually enough because the coach already knows your child.
For family and social media clips, identification matters less because the viewers usually already know your child. But even here, a quick text overlay or arrow at the start can help, especially in wide shots where your child is one of many small figures on the field.
AI tools like PlayerTrac can automatically add a visual indicator — a spotlight circle or highlight effect — that follows your child through the clip. This eliminates the need to learn any overlay or annotation tools. If you're doing it manually, most free video editors (CapCut, iMovie, InShot) let you add a text box or arrow that appears for the first few seconds of the clip. It takes 30 seconds per clip and makes a massive difference in how useful the clip is.
Build a Playlist Instead of Learning an Editor
Here's where many parents get stuck. They think the next step is to learn Adobe Premiere Pro, Final Cut Pro, or DaVinci Resolve — professional video editing software that takes weeks to learn and costs hundreds of dollars. They watch YouTube tutorials, try to figure out timelines and keyframes and export settings, and eventually give up because it's just too much.
You do not need to learn video editing software. For the vast majority of parent use cases, the workflow is simpler than you think:
- Save individual clips as separate files. Each clip is one moment — one pass, one save, one goal. Keep them as individual video files, not as one long compilation.
- Organize them into folders. Use a simple folder structure: a folder per season, subfolders for each category (Recruiting, Development, Family). Name each file with the date and a brief description:
2026-08-10_through-ball-assist.mp4. - When you need a reel, arrange the clips. A YouTube unlisted playlist, a Google Drive shared folder, or a simple compilation using a free app like CapCut or InShot is all you need. Drag the clips into the order you want, and you're done.
- When you get better clips, swap them in. Your highlight reel is a living document. After a great game, replace weaker clips with stronger ones. Because each clip is a separate file, this takes seconds — you're not re-editing a 5-minute video from scratch.
This "playlist" approach has a major advantage over traditional video editing: it's modular. Need to send three clips to a coach? Grab three files. Need to send a different set to another coach who plays a different style? Grab a different three. Need to add a new clip from this weekend's game? Drop it in the folder. No rendering, no timeline, no export settings.
For parents who do eventually want a polished compilation — a single video with clips stitched together, perhaps with a title card and the player's name — free tools like CapCut (mobile or desktop), iMovie (Mac/iPhone), or even Canva's video editor can handle this in 15 minutes. But start with individual clips in folders. You can always combine them later.
What If You Only Have Phone Footage
Good news: phone footage is far more useful than most parents assume. If you recorded your child's game on an iPhone or Android phone from the last three to four years, you likely have footage that's perfectly adequate for player tracking, highlight clips, and even recruiting videos.
Modern phones shoot at 1080p or 4K resolution by default. Even at 1080p, you have enough pixel density to crop into a wide shot and still produce a clear, watchable clip of your child. The quality ceiling for youth soccer video is not "broadcast quality" — it's "can you clearly see what the player is doing?" Phone footage clears that bar easily.
That said, phone footage does come with some specific challenges. Here's how to handle each one:
- Stability. Hand-held phone video is the number one quality issue parents face. The fix is simple and cheap: a phone tripod. A $15-25 tripod from Amazon with a phone mount transforms your footage from shaky and distracting to smooth and professional-looking. If you don't have a tripod, lean the phone against a water bottle or fence post. Anything is better than hand-holding for 90 minutes.
- Framing. Most parents zoom in too much. Shoot wider than you think you need to. You can always crop later in post, but you can't add field area that was never captured. Set your phone to 1080p (not 4K, to save storage), hold it in landscape mode, and frame the full half-field at minimum.
- Storage. A full 90-minute game at 1080p will use roughly 5 to 8 GB of storage. At 4K, expect 15 to 20 GB. Before game day, make sure you have enough space. Delete old photos or transfer files to a computer or cloud storage. There's nothing worse than your phone running out of space at halftime.
- Battery. Recording video for 90 minutes drains batteries fast. Bring a portable charger or plug in if you're near an outlet. Airplane mode during recording can extend battery life by 20-30%.
Phone footage works perfectly well with AI player tracking tools. In fact, the guide to building highlights from phone video walks through the entire process. The AI doesn't care whether your footage came from a $3,000 camera or your phone — it cares about resolution, stability, and whether the player is visible.
Bottom line: If your phone can record video, your phone can produce useful soccer clips. Don't let "I only have phone footage" be the reason you don't start.
What About Multiple Children
If you're a parent with two kids on the same team, or if you've volunteered to film for several families, the video review process can feel overwhelming. One game's worth of footage suddenly needs to produce clips for two, three, or more players. The good news is that the process is exactly the same — it's just repeated.
The footage doesn't change. You don't need to record the game multiple times or from multiple angles (though having more than one angle is always helpful). A single wide-shot recording of the full game contains every player's moments. You just need to go through it once per player.
With AI tracking, this is straightforward. Upload the game once, then run the tracking separately for each child. Point to Player A, get their clips. Point to Player B, get their clips. The same footage, processed multiple times, produces individualized results for each player. This is one of the biggest time-saving advantages of AI-based tools — you're not rewatching the game from scratch for each child. The AI does the rewatching.
Without AI, be systematic. Don't try to track multiple players simultaneously while scrubbing — you'll miss moments for everyone. Instead, do one complete pass per player. First pass: find all of Player A's moments and save those clips. Second pass: Player B. It feels redundant, but it's faster and more accurate than trying to catch everything at once.
For organization, keep each player's clips in their own folder. If you're filming for other families, a shared Google Drive or Dropbox folder per player makes it easy to share clips without mixing things up. Label folders clearly: Emma_Clips_2026, Jake_Clips_2026.
If you're the "team videographer" parent and you're filming for the whole squad, consider setting up a Veo or Trace camera. These wide-angle, elevated cameras capture the entire field automatically and produce footage that any parent can then process for their own child. It spreads the benefit across the whole team for a single setup effort.
A Recruiting Video Doesn't Need to Be a Movie Trailer
Let's address the elephant in the room. Many parents — especially those new to the recruiting process — believe a recruiting video needs to look like a professional production. Slow-motion intro shots. Dramatic music. Cinematic color grading. Custom graphics. Player name in a bold font flying across the screen.
It doesn't. And spending time and money on those things can actually work against you.
College coaches are busy. They review dozens of videos per week during recruiting season. They don't want to sit through a 30-second cinematic intro to get to the actual footage. They want to see the player play. That's it. Here's what coaches actually care about:
- Can they identify the player immediately? A simple text overlay at the start — name, jersey number, position, graduation year — is all you need. An arrow or circle pointing to the player in the first clip is helpful.
- Is the footage clear enough to evaluate the player? They need to see technique, decision-making, and athleticism. 1080p phone footage from a reasonable angle is more than sufficient.
- Are the clips relevant to the player's position and strengths? A center back's video should show defending, distribution, and aerial ability — not just the one time they dribbled up the field.
- Is the video a reasonable length? Three to five minutes of strong clips is better than eight minutes of everything. Quality over quantity, always.
Fancy production actually raises suspicion in some coaches' minds. It can suggest that the family is trying to compensate for mediocre play with polished packaging. The best recruiting videos are simple, clear, and focused on the player's ability. Our college soccer recruiting video guide breaks down exactly what coaches want to see and how to structure your reel.
Save your money and your time. A folder of well-chosen, clearly labeled clips — or a simple compilation with a title card — will serve your child better than any Hollywood-style production ever could.
A Realistic Parent Workflow
Let's put everything together into a practical, repeatable process that a busy parent can actually follow. This isn't aspirational — it's designed to take 20 to 30 minutes per game, not hours. Here's the workflow:
Step 1: Record the game
Set your phone on a tripod behind the touchline, ideally at midfield and slightly elevated if possible (a small step stool, the top row of bleachers, or a camera pole all work). Frame the full field or at least the full half. Press record. Walk away and watch the game. Don't touch the phone unless you need to adjust at halftime. If your team has a Veo or other camera, even better — let it handle the recording.
Step 2: Transfer the file and label it
After the game, transfer the video to your computer or upload it to cloud storage. Label the file with the date, opponent, and any relevant notes: 2026-08-10_vs_Eagles_W3-1.mp4. This takes two minutes and saves you immense confusion later when you have 30 game files and can't remember which is which.
Step 3: Process through AI tracking or do a quick manual review
With AI: Upload to PlayerTrac or your tracking tool of choice. Identify your child. Let the system process the video and present your child's moments. This typically takes a few minutes of processing time during which you can do something else.
Without AI: Sit down with the video and your child. Ask them to tell you their key moments. Jump to those timestamps first. Then do a quick scrub through the rest at 4x speed, pausing when you spot your child involved in play. This takes 20 to 30 minutes manually.
Step 4: Save the best 5 to 10 clips to your library
From the tracked moments, pick the best 5 to 10 clips. Save each one as a separate file. Drop them into your organized folder structure (Recruiting, Development, Family). Don't agonize over selections — you can always revisit the full game later if you need more clips.
Step 5: Once per month (or when needed), review your library and update the reel
Set a reminder — once a month during the season, or before any recruiting event. Open your Recruiting folder. Are the clips still your child's best work? Replace any that have been surpassed by newer, stronger clips. If you need to send a reel to a coach, arrange your top 8 to 12 clips in a playlist or quick compilation. This review takes 10 to 15 minutes.
The total time investment: 20 to 30 minutes per game for recording and clipping, plus 10 to 15 minutes per month for curation. That's it. No hours of scrubbing. No expensive software. No video editing degree required. Just a sustainable system that builds your child's highlight library game by game.
Frequently Asked Questions
Do I need expensive video editing software?
No. For the vast majority of parent use cases, you don't need any traditional video editing software at all. AI tracking tools handle the hard part — finding your child in the footage and extracting clips. If you want to stitch clips together into a simple reel, free tools like CapCut, iMovie, InShot, or even Canva's video editor are more than enough. Professional software like Premiere Pro or Final Cut Pro is designed for filmmakers and content creators who need frame-level precision, complex effects, and multi-track audio mixing. You don't need any of that to build a soccer highlight clip. Save your money for new cleats.
How long should each clip be?
It depends on the purpose. For recruiting clips, aim for 8 to 15 seconds per clip — long enough to see the buildup and the action, short enough that a coach stays engaged. For development clips, 10 to 20 seconds gives enough context to analyze what happened and why. For social media, 5 to 10 seconds is ideal — the shorter the better for platforms like TikTok and Instagram Reels. For family clips, length doesn't matter — save the whole celebration if you want. When in doubt, save a longer clip. It's always easier to trim a clip down than to extend one that was cut too short.
What if my child doesn't want to be on video?
This is more common than you might think, especially with teenagers. Respect their feelings first. Have a conversation about why you're filming — it's not about surveillance or posting embarrassing moments online. It's about helping them improve, keeping memories, and (if relevant) building a recruiting portfolio that could open doors for their future. Many kids who are initially uncomfortable with being filmed come around once they see how useful the clips are for their own development. Let them review the clips with you and have input on what gets saved, shared, or deleted. Giving them control over the process usually eases the discomfort. If they're truly opposed to any public sharing, respect that boundary and keep clips private.
Can I use footage filmed by other parents?
Generally, yes — with some common-sense guidelines. If another parent filmed the game from the other side of the field and your child's goal is clearly visible in their footage, most parents are happy to share. Ask politely, and offer to share your footage in return. For AI tracking, you can upload any footage you have legitimate access to. The key consideration is privacy and consent: if you're sharing clips publicly (social media, recruiting profiles), make sure you're comfortable with how other children appear in the background, and be aware that some leagues or clubs have policies about video sharing. For private use — reviewing with your child, sharing with family, sending to coaches — using footage from other parents is standard practice in youth soccer.
How do I share clips with coaches?
Keep it simple. Most coaches prefer one of these methods: a shared Google Drive or Dropbox link with clearly labeled clip files, an unlisted YouTube playlist where clips are uploaded individually and arranged in order, or a single compiled video (3 to 5 minutes) sent as a file or link. Avoid sending raw, unprocessed 90-minute game films — coaches don't have time to scrub through them. Always include a brief text or email with the player's name, jersey number, graduation year, position, and which clips to prioritize. If a coach asks for "game film," that typically means the full game — but even then, include timestamps of your child's key moments so the coach can jump to the relevant sections. The easier you make it for the coach to find and evaluate your child, the more likely they are to actually watch the whole thing.