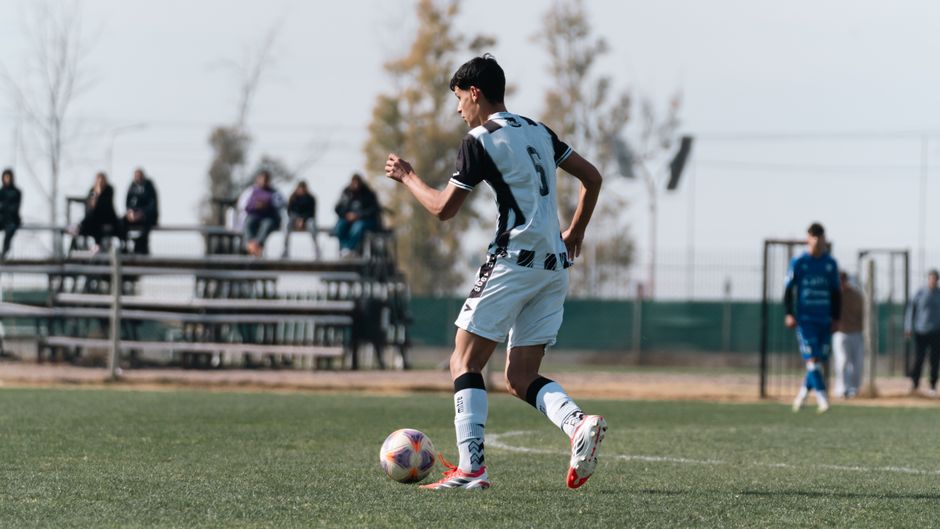
Every spring, the same scene plays out in thousands of households across the country. The season just ended. College ID camps and showcases are weeks away. The recruiting email needs to go out. And somewhere in the family computer — or scattered across three phones and a cloud drive — sits 20, 25, sometimes 30 full-length game recordings from the past eight months. Now comes the hard part: turning all that footage into a polished 3-to-5-minute recruiting reel.
It doesn't have to be this way. Instead of treating your recruiting reel as a single, massive end-of-season project, you can build it progressively — game by game, week by week — so that when recruiting deadlines arrive, your reel is already done. This guide walks you through the exact system for doing that.
The End-of-Season Editing Trap
The end-of-season editing trap is real, and almost every recruiting family falls into it. Here's how it usually goes: the fall season starts, everyone is focused on games, practices, and weekend tournaments. Nobody is thinking about the recruiting reel yet. "We'll deal with that after the season," the family says. And so the games stack up — one after another — each one filmed and saved to a hard drive or cloud folder, but never reviewed.
Then the season ends. Suddenly, there's urgency. College coaches are evaluating prospects, ID camp registration deadlines are approaching, and the recruiting email needs to go out with a link to a highlight video. The family sits down on a Saturday morning, opens the first game file, and realizes they're looking at 90 minutes of wide-angle footage. They can't remember which games had the best moments. Was that incredible through ball in the September match against the Lightning, or was it October against FC United? Did the goal happen in the first half or the second?
So they start watching. All of it. Fast-forwarding, rewinding, trying to find the moments they vaguely remember. After four hours, they've gotten through maybe five games and have a handful of clips. There are still 15+ games to go. The energy drains. The project starts to feel impossible.
This is where one of three things happens:
- They rush the job — grabbing whatever clips they can find quickly, producing a reel that doesn't represent the player's best work. Maybe they include a few mediocre plays just to fill the runtime. The reel goes out, but it's not what it could have been.
- They pay someone to do it — hiring a video editor who has never seen the player play and doesn't know which moments matter most. The editor produces something technically clean but generically assembled, lacking the context that makes a reel truly compelling.
- They give up or delay — pushing the reel back weeks or months, missing early recruiting windows and losing momentum in the process. Some families never get the reel done at all.
None of these outcomes are good. But the root cause isn't laziness or lack of effort — it's a flawed process. The end-of-season approach treats the reel as a single, monolithic project. The progressive approach treats it as an ongoing habit, like keeping stats or maintaining a training journal. And it's not nearly as hard as it sounds.
Build a Clip Library After Every Game
The foundation of the season-long reel system is building a clip library — a growing collection of your best moments — by reviewing footage shortly after each game. The key phrase here is "shortly after." Within 24 to 48 hours of the match, while the game is still fresh in everyone's mind, sit down with the footage and identify your strongest moments.
This is not the time to edit a reel. You're not cutting transitions, adding music, or building a final product. You're simply saving individual clips — raw, unedited segments of the game where you did something worth highlighting. Think of it like taking notes in a class: you're capturing the important moments while they're fresh so you can organize them later.
Here's what to look for as you review:
- Key touches — Goals, assists, shots on target, through balls, switches of play, dribbles that beat defenders.
- Defensive plays — Clean tackles, interceptions, headers won, recovery runs, 1v1 defending.
- Work rate moments — Pressing sequences, tracking runs, box-to-box play, winning second balls.
- Off-ball intelligence — Smart runs that created space, checking movements, positioning to receive the ball, defensive shape.
- Set pieces — Free kicks, corners, penalty kicks, throw-in routines where you were involved.
Don't be too selective at this stage. If a moment looks good, save it. You can be ruthless about quality later when you're building the actual reel. Right now, the goal is to capture everything that might be useful. If you save 10 to 15 clips per game, that's perfectly normal. Some games will yield more; some will yield fewer. The point is that you have them.
Save each clip as its own file in a dedicated folder. Don't embed them in a timeline or editing project yet. Individual clip files are flexible — you can rearrange them, swap them in and out, and combine them in any order later. A clip buried in an editing timeline is locked in place until you go back into the editor and move it.
By midseason, you might have 80 to 120 individual clips. That sounds like a lot, but because each one is a short, standalone moment, reviewing them takes minutes, not hours. You can scroll through your library, watch a few seconds of each, and immediately identify your strongest material. Compare that to scrubbing through 20 full-length game recordings — the time savings are enormous.
A Simple Naming System
A clip library is only useful if you can find what you're looking for. If your folder is full of files named "clip_001.mp4," "game_footage_new_v2.mov," and "Saturday game good play.mp4," you've created a different kind of mess. A simple, consistent naming convention solves this problem entirely.
Use this format for every clip: date_opponent_description.
Examples:
2026-03-15_vs-FC-Dallas_through-ball-assist2026-03-22_vs-Surf_header-from-corner2026-04-02_vs-Rush_recovery-tackle-1v12026-04-02_vs-Rush_long-range-shot-on-target2026-04-16_vs-Strikers_switch-of-play-60yd2026-05-01_vs-United_goal-right-foot-near-post
This naming system gives you three things immediately, without watching the clip:
- When it happened — The date tells you how recent the clip is. Newer clips are generally more valuable for recruiting purposes because they show current form.
- The context — The opponent name tells you the level of competition. A clip against a top-ranked opponent carries more weight than one against a weaker team.
- What the clip shows — The description tells you the type of play. When you need a passing clip for your reel, you can scan the file names and immediately find every through ball, switch of play, and assist without watching a single file.
Using dates in the YYYY-MM-DD format means your files sort chronologically by default in any file browser. This is a small detail that saves real time when you're scrolling through a season's worth of clips.
Stick with hyphens or underscores instead of spaces in your file names — some video editing software and cloud platforms handle spaces inconsistently. Keep descriptions short but specific. "Good play" tells you nothing six months later. "Recovery-tackle-1v1" tells you exactly what you'll see when you click.
Tag Clips by Quality
Once you have a growing library with properly named clips, the next layer of organization is tagging them by type and quality. This is what turns your library from a collection into a system — one where building or updating your reel takes minutes instead of hours.
There are two approaches that work well:
Folder-based system: Create subfolders within your clip library for each skill category:
- Finishing (goals, shots on target)
- Passing (through balls, switches, assists, combination play)
- Defending (tackles, interceptions, headers, recovery runs)
- Work rate (pressing, tracking, box-to-box play)
- Off-ball movement (intelligent runs, positioning, creating space)
- Set pieces (free kicks, corners, penalties)
Copy (don't move) clips into these folders so you still have your chronological master library intact. Some clips fit multiple categories — a recovery run that leads to winning the ball is both "defending" and "work rate." Put it in both folders.
Spreadsheet-based system: Create a simple spreadsheet with columns for: file name, date, opponent, skill type, and a quality rating. The quality rating is the critical piece. Use a simple three-tier system:
- Strong — Your absolute best. These clips would impress any coach immediately. Clear execution, meaningful impact on the game, and visually compelling. These are your first-choice reel clips.
- Good — Solid plays that show your ability, but maybe the camera angle isn't ideal, or the play was good but not spectacular. These are your backup clips — they'll fill in if you don't have enough "strong" clips in a particular category.
- Decent — Worth saving, but unlikely to make the reel unless you need something specific they show. Archive material.
When it's time to build or update your reel, you filter for "strong" first. If you need more clips in a category, you pull from "good." You never need to re-watch your entire library — the tagging has already done that work for you.
This tagging step adds maybe two or three minutes to your post-game review. It's a tiny investment that pays off massively when reel-building time comes. As noted in our guide to what should be in a college soccer recruiting video, coaches want to see a variety of skills — not just goals. Having your clips organized by type ensures your reel covers the full range of your game.
Keep a Best-of-Season Group
As your clip library grows throughout the season, you need a way to keep track of what's actually reel-worthy versus what's just in the archive. The solution is a three-tier grouping system that you maintain and update after every few games.
Tier 1: Reel-Ready (10-15 clips)
These are your absolute best clips from the season so far. These are the clips that are currently in your reel — or would be in your reel if you exported it right now. They represent your strongest moments, your most impressive plays, and the clearest demonstrations of your ability. Every one of these clips could make a coach pause and take notice.
Keep this group tight. Ten to fifteen clips is the right size for a 3-to-5-minute reel (depending on clip length). If you have 25 clips in your "reel-ready" group, you haven't been selective enough. Force yourself to choose. Which clips would you show if you only had 60 seconds of a coach's attention? Those are your reel-ready clips.
Tier 2: Strong Bench (10-20 clips)
These are great clips that didn't quite make the top tier — maybe because you already have a stronger clip showing the same skill, or because the camera angle isn't quite as good, or because the play itself was excellent but not elite. Think of this as your bench: talented players waiting for their chance to get in the game.
The strong bench serves two critical purposes. First, as the season progresses and you capture better moments, clips from the strong bench get promoted to reel-ready while older or weaker reel-ready clips get demoted. This is how your reel improves over time without a complete rebuild. Second, when you need to build a different version of your reel — a position-specific cut, a shorter teaser, or a version that emphasizes a particular skill — you pull from the strong bench to supplement your reel-ready clips.
Tier 3: Archive (everything else)
Every other clip you've saved lives here. These are moments that were good enough to clip but not strong enough for the reel. You keep them because you never know when they might be useful. Maybe a coach asks to see examples of your defending, and your archive has three solid defensive clips that aren't in your main reel. Maybe you want to create a position-specific compilation down the road. The archive is your safety net.
Review your tiers every three to four games. Promotion and demotion should be happening regularly. A clip that was your best through ball in March might be outclassed by a better one in May. That's the whole point — your reel keeps getting better because you're constantly replacing good with great.
Replace Clips Instead of Adding
This is one of the most important principles in the entire system, and the one families most often violate: your reel should stay at 3 to 5 minutes, no matter how many great clips you accumulate.
The temptation is understandable. Every few weeks, you capture another great moment. A beautiful goal. A perfectly timed tackle. An assist that splits three defenders. Each one feels too good to leave out. So you add it to the reel. And you add the next one. And the next. By midseason, your reel is 8 minutes long. By the end of the season, it's 12 minutes. And now you have a different problem: a reel that's too long for any coach to watch.
College coaches — especially at the D1 and competitive D2 level — receive hundreds of recruiting emails. They're not watching 12-minute videos. Most will give your reel 60 to 90 seconds before deciding whether to keep watching. If your best clips are buried in a bloated reel, coaches may never see them.
The discipline is in replacing, not adding. When you capture a stronger clip, it takes the place of a weaker one. Your reel doesn't get longer; it gets better. Think of it like a starting lineup: you have 11 spots. When a better player joins the team, someone gets moved to the bench. The team stays the same size, but the quality goes up.
Here's a practical approach: each time you have a new "reel-ready" clip, watch it side-by-side with the weakest clip currently in your reel. Is the new one stronger? Swap them. Is the current one still better? The new one goes to the strong bench. This comparison takes less than a minute and keeps your reel permanently sharp.
A 4-minute reel with 12 elite clips will always outperform a 10-minute reel with 12 elite clips and 20 mediocre ones. Coaches evaluate your judgment as well as your talent. A tight, well-curated reel signals both.
Keep the Opening Fresh
If there's one thing to obsess over in your recruiting reel, it's the first 30 to 60 seconds. This is where coaches decide whether to keep watching. Your opening clips are your audition — they set the tone for everything that follows.
As the season progresses, your opening should be updated with your most recent strong clips. There are two reasons for this:
- Coaches want to see current form. A clip from six months ago is fine in the middle of your reel, but leading with it raises questions. Are you still playing at that level? Have you improved or regressed? Leading with recent footage signals that this is who you are right now — not who you were last spring.
- Recent clips often show improvement. If you're developing as a player (and you should be), your most recent footage is likely your best footage. The through ball you played in April is probably sharper than the one from September. Your touch is cleaner, your decision-making is faster, your physical presence is stronger. Show that growth by leading with where you are now.
A good rule of thumb: your first three to four clips should be from the most recent month of play. After that, you can mix in older clips as long as they're strong. This creates a reel that opens with immediacy and current form, then broadens into a full picture of your season.
If a coach watches only 30 seconds — and many will, at least initially — you want those 30 seconds to feature your absolute best, most recent work. If they watch the full reel, they'll see a range of moments across the season. Either way, the opening did its job.
Update the opening every two to three weeks during the season, or whenever you capture a new clip that's stronger than what's currently in the first 60 seconds. This is a five-minute task if your clip library is organized — you're just swapping one clip for another at the front of the timeline.
Save Full-Game Film Separately
Your highlight reel is the hook. Full-game film is the follow-up. And when a coach asks for it — and they will, if they're interested — you need to be ready to deliver immediately.
College coaches use full-game film to evaluate things that highlight reels can't show: how you play when you don't have the ball, how you respond to adversity, how you fit into a team's tactical structure, how you communicate with teammates, and whether your effort level stays consistent over 90 minutes. A 4-minute reel shows your highlights; a full game shows your character.
Keep every game recording from the season, organized in a dedicated folder structure:
Full Games/2026-03-15_vs-FC-Dallas/2026-03-22_vs-Surf/2026-04-02_vs-Rush/2026-04-16_vs-Strikers/
Inside each folder, include the full game file and, optionally, a brief text note with key details: the final score, your jersey number and color, the half where your best play happened, and any context that might be helpful (e.g., "switched from right wing to center mid at halftime").
When a coach emails asking for full-game film, you want to respond within hours, not days. Having your games organized and ready to share — via a cloud link, a file-sharing service, or whatever the coach prefers — shows professionalism, preparation, and genuine interest in their program. A coach who asks for full-game film is seriously evaluating you. Don't make them wait.
Storage can be a practical concern. Full-game recordings in HD take up significant space. Use a cloud storage service (Google Drive, Dropbox, or similar) so the files are accessible from anywhere and easy to share via link. Compress files if needed, but prioritize video quality — a blurry full-game recording defeats the purpose.
The 20-Minute Post-Game Habit
Everything described above — building the clip library, naming files, tagging quality, maintaining the tier system — sounds like a lot of work when you read it all at once. In practice, it's a 20-minute habit after each game. That's it. Twenty minutes, and you never have to face the end-of-season editing mountain.
Here's the breakdown:
Minutes 1-5: Upload and transfer the footage.
Get the game recording off the camera, phone, or SD card and onto your computer or cloud storage. If you're using a team camera system like Veo or Trace, the upload might happen automatically — just make sure you have access to the file. If a parent filmed on a phone, AirDrop or cable-transfer the file to your computer. This step is pure logistics. Do it the same day as the game so the footage doesn't get buried in a camera roll.
Minutes 5-15: Quick review while memory is fresh.
Scrub through the footage at 2x speed. Because you just played the game, you know where the good moments are. You remember that through ball in the first half. You remember the tackle just before halftime. You remember the run behind the defense that should have been a goal if the pass had been better. Your memory is your guide — you're not watching the entire game in real time, you're skipping to the moments you already know are there.
When you find a strong moment, clip it. Most video players and basic editing tools let you trim a segment and save it as a new file. You don't need professional software for this — even the built-in tools on a Mac or PC can handle simple clip extraction. If you're using AI player tracking tools, the clip extraction may already be done for you, and you just need to review what the system pulled.
Minutes 15-20: Save clips with proper names and tag quality.
Name each clip using the date-opponent-description format. Drop them into your clip library folder. Make a quick note in your spreadsheet (or move them into the right skill-category subfolder) and assign a quality rating: strong, good, or decent. If any clip is clearly in "reel-ready" territory, note that too.
That's 20 minutes. Do it after every game. After 20 games, you have a comprehensive, organized, quality-rated clip library — and you've spent a total of about 6 to 7 hours across the entire season. Compare that to the 10 to 15 hours (or more) that families typically spend trying to do the same work in a single end-of-season marathon session, except with worse results because memory has faded and fatigue sets in.
The 20-minute post-game review is the single highest-leverage habit in the recruiting video process. It turns a dreaded, overwhelming project into a small, manageable routine. Make it as automatic as packing the gear bag after the game.
Mixed Footage Is Fine
One concern families often have about the season-long approach is consistency. "Our clips come from different sources — some from a Veo camera, some from a GoPro, some from a parent's iPhone. Won't that look unprofessional?"
The short answer: no. Coaches care about seeing you play. They do not care about production consistency. A recruiting reel is not a commercial. It's a tool for evaluation. If a coach can see you make a brilliant tackle in one clip filmed by a Veo camera and a composed finish in the next clip filmed on an iPhone from the sideline, they're evaluating the tackle and the finish — not the camera equipment.
In fact, having footage from different sources can work in your favor:
- Different angles show different things. A wide-angle Veo shot shows your positioning and off-ball movement. A sideline phone video shows close-up technique and body mechanics. A GoPro behind the goal shows your composure in the box. Each perspective gives coaches a different view of your game.
- It demonstrates consistency across contexts. If your clips come from different games, different camera setups, and different lighting conditions — and you look strong in all of them — that's a more convincing argument than a single, perfectly filmed game where everything went right.
- It's realistic. Coaches know that youth soccer families don't have production crews. They've watched thousands of recruiting reels with mixed footage quality. What matters is whether they can see you clearly enough to evaluate you.
That said, there are minimum standards. Footage should be stable enough that the action is followable (a wildly shaking camera is a problem). You should be identifiable — either through jersey number, a visual indicator, or player highlighting tools that make you easy to spot. And the resolution should be high enough that a coach can see what's happening. If a clip is so blurry or shaky that a coach can't tell what you're doing, leave it out regardless of how good the play was.
Beyond those basics, don't stress about matching cameras, color profiles, or video quality across clips. Your reel is a portfolio, not a movie. Mix and match freely.
Build Different Versions for Different Audiences
One of the biggest advantages of the clip library approach is that building multiple versions of your reel becomes trivial. Instead of one monolithic video that you send to every coach, you can tailor your presentation to different contexts — and with an organized library, each version takes minutes to assemble.
Version 1: The General Reel (3-5 minutes)
This is your primary recruiting video. It covers the full range of your game: technical ability, tactical awareness, physical qualities, and game impact. It leads with your strongest, most recent clips and includes a mix of skill types (finishing, passing, defending, work rate, off-ball movement). This is what you send in your initial outreach emails to coaches.
Version 2: The Short Teaser (60-90 seconds)
A highlight-reel trailer. Your absolute five or six best clips, back to back, with your contact info at the start and end. This version is designed for situations where you need to grab attention fast: a first-contact email, a social media post, or a quick share with a scout at a tournament. Think of it as the movie trailer that makes coaches want to see the full film.
Creating this version is simple: take your top five or six "reel-ready" clips, arrange them for maximum impact, and export. If your library is organized, you can build this in 10 to 15 minutes.
Version 3: Position-Specific or Skill-Specific Reel (2-3 minutes)
Some coaches want to see specific things. A defensive coach at a school you're targeting might want to see your defensive work in detail. A program that plays a possession-heavy style might want to see your passing range and composure on the ball. With your clips tagged by skill type, you can pull all your "defending" clips or all your "passing" clips and build a focused reel that speaks directly to what that coach cares about.
You don't need to build these proactively for every possible audience. But having the library organized means you can build them on demand. If a coach says, "Send me a reel focused on your defensive play," you can have it in their inbox within 24 hours — and that responsiveness makes an impression.
The key insight is that the work of selecting and organizing clips was already done during the season. Building different versions is just re-arranging blocks that are already cut, named, and rated. It's assembly, not creation.
Where AI Helps and Where It Doesn't
AI player tracking tools like PlayerTrac can dramatically accelerate parts of this workflow — but they're not a replacement for every step. Understanding where AI adds value and where human judgment is still essential helps you use these tools effectively.
Where AI helps enormously:
- Clip extraction. This is the biggest time-saver. Instead of manually scrubbing through 90 minutes of game footage looking for your moments, AI can automatically track your player through the entire match and extract clips of every meaningful involvement. What might take you 30 to 45 minutes per game manually can be reduced to a few minutes of review time.
- Player identification. AI tracking follows your specific player through the footage, so every clip is already centered on your actions. You don't need to add arrows or circles after the fact — the system has already identified and followed you.
- Working with any footage. Whether your team uses a Veo camera, a Trace system, a GoPro, or a phone from the sideline, AI tracking works with the footage you actually have. You don't need specific camera equipment or angles. This is especially useful for the season-long approach because your footage sources may vary from game to game.
- Speed of the post-game review. When AI handles the clip extraction, your 20-minute post-game habit gets even shorter. Instead of scrubbing through footage manually, you're reviewing a set of pre-extracted clips and rating them. The 10-minute "review" step might shrink to 5 minutes.
Where human judgment is still essential:
- Evaluating clip quality. AI can identify that you were involved in a play, but it can't tell you whether that involvement was impressive enough for a recruiting reel. A through ball is a through ball to the algorithm — it doesn't know whether it was a routine sideways pass or a perfectly weighted ball that split three defenders. You still need to watch each clip and decide: strong, good, or decent.
- Reel structure and arrangement. The order of clips in your reel matters. Leading with your strongest moments, grouping by skill type or game, pacing the video so it builds momentum — these are creative and strategic decisions that AI can't make for you. You know your game, your strengths, and what you want coaches to see first.
- Context and audience. You know that the goal against the state champions matters more than the goal against the bottom-of-the-table team. You know that a particular coach values defensive work. You know that your most recent footage shows how much you've improved. AI doesn't have this context. Your judgment about which clips to include, which to leave out, and how to present them is what turns a collection of clips into a compelling recruiting story.
- The final edit. Transitions, title cards, intro and end cards, music (if any), and overall polish — these are finishing touches that require a human eye. AI gets you 80% of the way there by extracting the raw material. The last 20% is your curation and assembly.
The ideal workflow combines both: AI handles the tedious, time-consuming work of finding your clips in full-game footage, and you handle the judgment calls about what's strongest and how to present it. Together, the season-long approach that might otherwise take 20 minutes per game can take 10 to 15 — and the quality of your clip library is higher because AI catches moments you might have missed or forgotten.
Frequently Asked Questions
How often should I update my reel?
A good cadence is every two to four weeks during the season, or after every three to four games. You don't need to re-export your reel after every single game — that's overkill. But you should be reviewing your tier system regularly and swapping clips when you capture something stronger. If you're actively emailing coaches, update the reel before each new batch of outreach so it always reflects your most recent and strongest play. During tournament weekends where you play three or four games in a few days, wait until after the tournament to do a batch review and update.
What if I miss a game's review?
Life happens. You might miss a post-game review after a midweek game or a tournament where you're exhausted. The system still works — you just catch up when you can. The footage doesn't expire. It's better to review a game a week later than to never review it at all. That said, the sooner you review, the better your recall will be. If you wait too long, you lose the advantage of remembering where the good moments happened, and you're back to scrubbing through the whole game. Try to stay within a week. If you fall behind by several games, set aside 45 minutes to do a batch review — it's still far more efficient than the end-of-season approach.
Should I include preseason footage?
Yes, if it's strong. Preseason scrimmages and friendlies are real game footage — they show you competing against real opponents in real game conditions. The quality of the play matters more than the formality of the competition. A brilliant piece of play in a preseason friendly is still a brilliant piece of play. That said, as the season progresses and you accumulate stronger clips from competitive matches, preseason clips will naturally get replaced by better material. Start with what you have, and let the system do its work of continuous improvement.
How do I handle tournaments with 3-4 games in a weekend?
Tournament weekends are a gold mine for clip material — you're playing multiple games in a short window, often against high-quality opponents. But doing a full 20-minute review between games isn't realistic when you have three matches in two days. Here's what works: during the tournament, just transfer the footage to your device after each game and jot down two or three notes about your best moments ("first half, scored near post from cross" or "second half, recovery run on counterattack"). That's it — 3 minutes per game. Then, within a few days after the tournament, do a batch review session. Set aside 45 to 60 minutes, review all three or four games using your notes as a guide, and clip the best moments. Your notes will fast-track the process so you're not watching every minute of every game.
Can I use this system if my team doesn't film games?
The system works best with consistent footage, but it adapts to whatever you have. If your team doesn't provide film, you have a few options: ask a parent or sibling to film from an elevated position (press box, high bleacher row, or elevated sideline spot), use a phone on a tripod, or invest in a personal camera setup like a GoPro on a small tripod behind the goal. You won't have footage from every game, and that's okay. Apply the system to the games you do have. Even if you only capture half your games, you'll still build a substantial clip library over the course of a season. And any footage you review and organize using this system is footage you won't have to deal with in a last-minute editing scramble.